
Tips to get the most form your NZ Strike Indicator Kit
Four Simple Tips for Getting the Most from the New Zealand Indicator System
The New Zealand indicator system has earned a loyal following amongst fly anglers for good reason. It's incredibly sensitive, highly adaptable and, when set up correctly, offers excellent strike detection while landing delicately on the water. Like any system, however, a few small refinements can make it even more effective.
Here are three simple tips that we've found make a real difference on the river.
1. Protect Yourself from the Snare Hook
One of the great advantages of the New Zealand indicator system is that the indicator tool is always close at hand, ready to adjust your indicator position in seconds. The downside is that the snare hook can occasionally catch on jackets, landing nets, sling packs or other items of clothing when it's not in use.
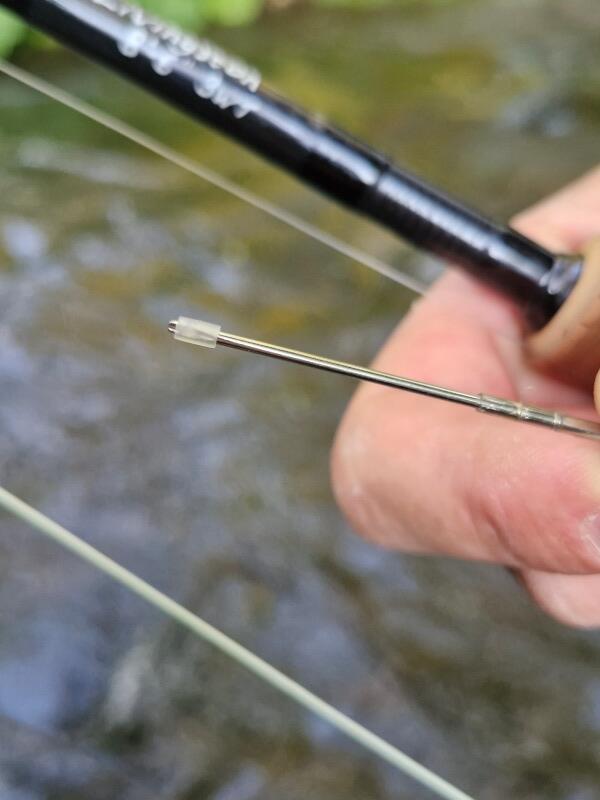
A simple solution is to slide a short length of the PVC tubing over the snare hook whenever you're fishing. It keeps the hook safely covered, prevents frustrating snags and protects your clothing and equipment from accidental damage. It's a tiny modification that makes life on the bank noticeably easier.
Before
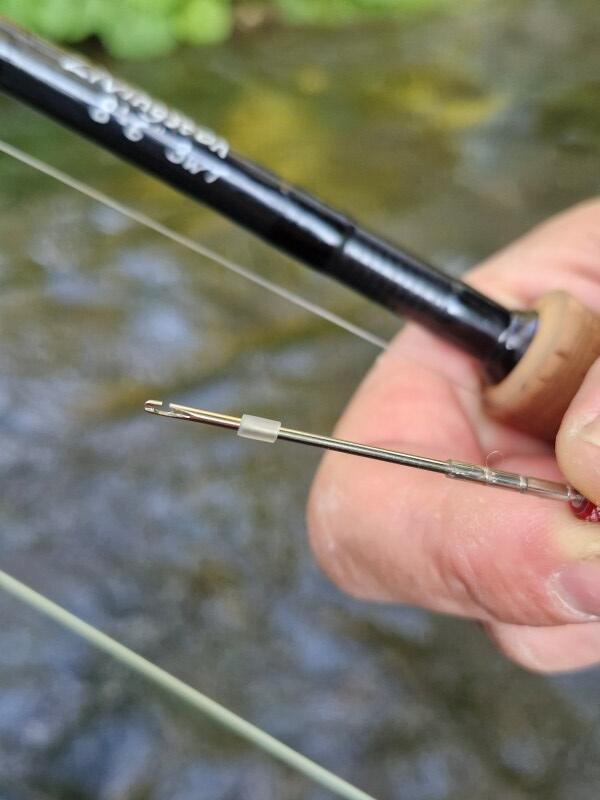
After
2. Choose Wool That Stands Out
Being able to see your indicator clearly is essential, particularly as light conditions change throughout the day. Bright sunshine, overcast skies and reflections from the water can all affect visibility.
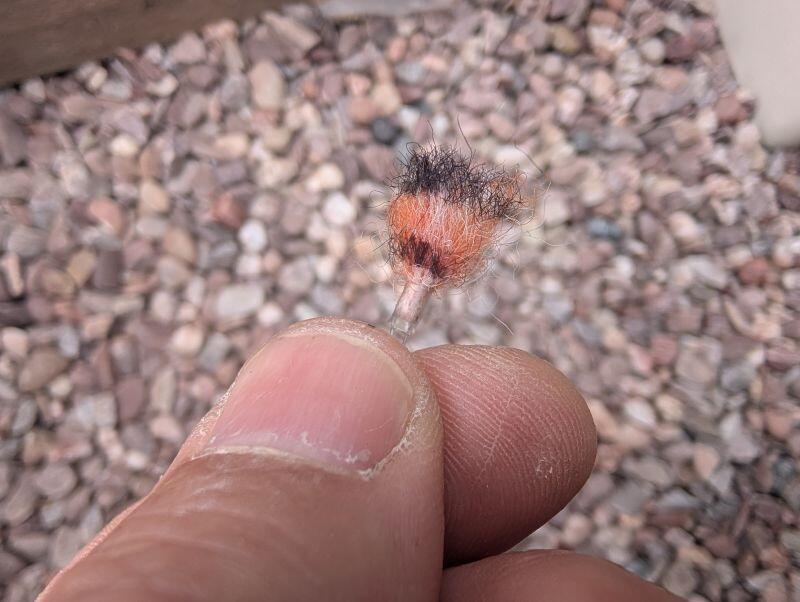
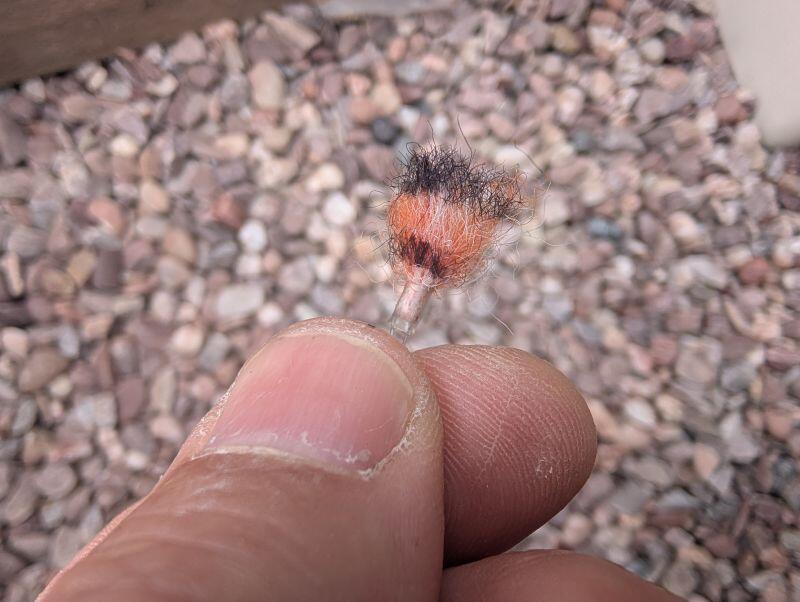
Rather than using a single-colour indicator, we prefer a blend of white and orange wool. The contrasting colours remain visible across a much wider range of lighting conditions than either colour alone. To improve visibility even further, add a few narrow bars with a black permanent marker. The extra contrast helps define the indicator against broken water and glare, making subtle takes easier to detect.
It's a simple trick that costs almost nothing but can significantly improve strike detection.
3. Keep Your Indicator Riding High
After landing a few fish or fishing for a while, wool indicators can begin to absorb water and lose some of their buoyancy. A waterlogged indicator sits lower in the surface film, making it harder to see and slightly less responsive to delicate takes.
A quick application of Loon Fly Dip restores the wool's natural buoyancy without leaving any greasy residue. Simply apply a small amount, work it through the fibres and your indicator will float high once again. It's worth keeping a bottle in your vest or pack, particularly on longer days when you'll be changing indicators or fishing through varying conditions.
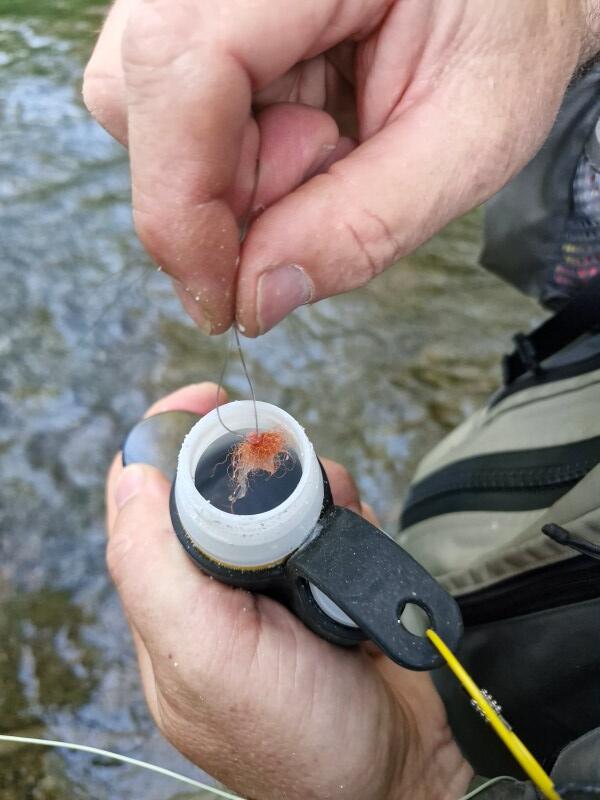
4. Keep Your Leader Floating Too
It's easy to focus on the indicator itself, but your leader plays just as important a role. If the section of leader between the fly line and the indicator begins to sink, it can gradually pull the indicator down into the surface film. Not only does this make the indicator harder to see, but it also reduces its ability to register subtle takes.
Treating the leader with floatant such as Loon Payette Paste helps it ride on the surface, allowing the indicator to remain high and visible. A floating leader also improves strike detection by reducing pull on the indicator, less disturbance when lifting off and cleaner hook sets.
Small Changes, Big Difference
The New Zealand indicator system is already one of the most effective ways to fish nymphs, but these three simple tweaks can make it even more effective to use.
Protect the snare hook with a small piece of the tubing, use a high-contrast multi-coloured wool indicator, and keep it floating at its best with Loon Fly Dip. They're all quick, inexpensive improvements that will help you spend less time fiddling with your tackle and more time concentrating on what really matters, watching that indicator disappear. New Zealand indicator system
Useful Links
- NZ Indicator System - New Zealand Strike Indicator Kit
- Payette Paste - Loon Payette Paste
- Loon Fly Dip - Loon Outdoors - Fly Dip